Contacts ![]()
Click here for customization information.
Click the Contact icon from the menu to display the Contact list.
Use the Contacts module to store all your contacts (including individuals, businesses, organizations and custom groupings). Connect contacts one to another to build a complete network of linked relationships. Add multiple addresses to any contact, record background and ownership information, add hundreds of custom fields through 10 special panels and gain quick access to action and activity, project, order and help desk records linked to the contact.
Importing contact records:
You can also use the Import Manager to import your existing contacts. Click here for more information.
The Contacts manager has two key forms:
- Contacts list for searching various ways and listing contacts.
- Contacts details to for adding new, modifying/deleting existing contacts and related information.
Connecting and visualizing connections:
Qwik has some powerful tools to let you connect contacts and visualize their relationships. Click here for more information.
The Contacts manager has two key forms:
Contact list
Use the contact list module to quickly seek and display contacts in a variety of ways.
List action area (your view may have different coloring, depending on style settings):

Use the [Search] button to locate a specific contact. Click here for information on searching. Click [First] to get the first set of records that match the search criteria. Click [Next] to get the next set.
Click [Print] to create a printable list of the currently-displayed record list. Select options to print only the columns in the displayed grid, or to display all columns in the record. Click Render vertically to change the format of the printable list.
Use the scrollbars to scroll the
list up and down, left or right. Click the folder icon ![]() on any row to display the complete detail record. Click [Add
New contact] to open the detail display to add new records.
on any row to display the complete detail record. Click [Add
New contact] to open the detail display to add new records.
Click on the title of any column to sort the list by that column. The display will change to show the records in either ascending or descending order. Click again to reverse the sort.
Customize the way the list displays, including column positioning, name and width and whether the column is to be displayed or hidden through the Administration module. Click here for more information.
If the list
is a pop-up from a search request, the background will be blue and
an additional icon (![]() ) will
display. Locate the row of the desired contact and click that icon
to return the contact information to the calling module.
) will
display. Locate the row of the desired contact and click that icon
to return the contact information to the calling module.
Contact Bulk Actions
Click [Bulk actions On/Off ] to display the bulk actions section. When this option is selected, each row in the list will contain a checkbox. Select the row(s) for which bulk actions are required:
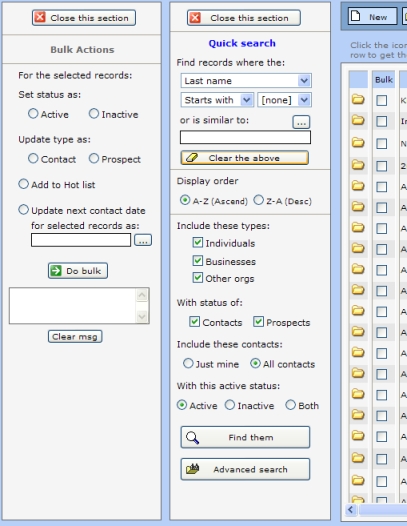
Bulk Actions:
Use this section to update all selected records.
- Set status to Active (0) or Inactive (1).
- Update selected records to Contact or Prospect.
- Add the selected records to your Hot list.
- Update next contact date.
Note: the Bulk Actions section might also display an area enabling the automatic creation of connections from the selected contacts to a specified contact.
Contact details
Details action areas:

Top of display:

See Buttons: below for more information.
Click [New] to start a new contact record. The record must be saved or cancelled before any other functions are available (getting activities, connections, help desk, documents, etc.). Click [Save] to save the contact record. A dialog will display if there are any errors requiring correction, or if there were no changes detected.
If the contact appears to be a duplicate, a dialog will be displayed advising you of the potential duplicate. You can review that possible duplicate by clicking the [Lookup] button beside the Company field to pop up the contact list.
Click [Cancel] to cancel current
changes. Alternatively, click in the checkbox ![]() beside the [Cancel] button to automatically cause cancellation when
the next action is taken. This is a quick way to move to another
function without having to press the [Cancel] button.
beside the [Cancel] button to automatically cause cancellation when
the next action is taken. This is a quick way to move to another
function without having to press the [Cancel] button.
Click [Save and exit] to save the current contact and exit to the contacts list.
Click [Go to Contacts list] to return to the contact list.
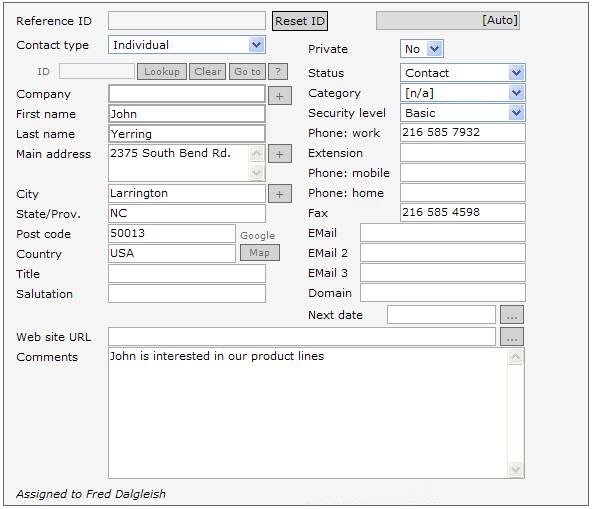
Entering information:
A reference ID will be automatically constructed based on the format specified in the Web.config file. The default is AAAAABBBBB00000 where "AAAAA" is first name, "BBBBB" is last name and "00000" is the last 5 digits of the automatically-assigned ID.
Update the reference by clicking [Reset ID]. Select a contact type from the drop down list. It's best to match type to fact. If you are going to enter a first and last name, the contact type should generally be Individual. Otherwise, select either Business or Organization as the type.
A business is considered to be a for-profit organization. An organization is any type of grouping, including not-for-profit organizations. However, you are free to designate any contact any way.
Continue through the fields, entering information as needed. For certain fields, like Comments, when you save the record, the character case will be automatically changed to form proper sentences, so you can enter everything in lower case if you wish.
Lookup and related buttons:


(beside ID)
(beside Address)
Using the above buttons: If you
enter a new contact and want to use company and/or address
information from an existing contact, click ![]() to pop up the contact list and locate and select the contact (you can
go to the detail record from the pop up if you want a more detailed
look), click
to pop up the contact list and locate and select the contact (you can
go to the detail record from the pop up if you want a more detailed
look), click ![]() (beside ID)
to add the company name, and
(beside ID)
to add the company name, and ![]() (beside Address) to add the address.
(beside Address) to add the address.
Other fields:
Most fields are self-explanatory.
Phones:

Enter any applicable phone numbers. Note: Phn nickname is typically the Skype nickname of the contact. All phone numbers are Skype-enabled.
Additional phones are available through the Address/phones panel.
Private: if you wish to exclude all users except yourself from viewing this contact, select the Yes option.
Domain: Enter a domain (for example: mydomain.com) for more broad-based email matching through the synchronization program, QSync. Any email with that domain, regardless of the addressee will post to the contact.
Security level: this field defines who can access this contact, in descending order of authority. The top item in the list is the most restrictive.
Next date: click the calendar [...] button to set a date to next visit this contact.
Email fields - 3 email addresses are provided. The buttons to the right will bring up a new Outlook email window with the email address inserted.
Web site URL, Wiki URL, Blog URL: enter applicable information. Click the button to the right of the entry field to go to that URL.
Custom fields:
If custom fields have been defined, they will be to the right of the dotted vertical line. Press the [tab] key after the last email entry, or use the horizontal scrollbar to move to the custom field area.
[New] - Begin a new contact record.
[Save] - Save the contact record.
[Save and exit] - Save the contact record and exit to the Contacts list.
[Cancel] - Cancel changes to the
contact record. Click the ![]() checkbox to automatically cancel current changes when starting a new
record or exiting to the Contacts list.
checkbox to automatically cancel current changes when starting a new
record or exiting to the Contacts list.
[Reassign] - Pops up a reassign dialog enabling the assigned owner to be changed.
[Paste] - Pops up the Quick contact form (see below).
[Outlook] - Prepares an Outlook contact record and displays it for you to add it to your desktop Outlook contacts.
[List view] - display the list.
[Memorize] or [Insert memory] - Copy the current contact informaion to the clipboard/paste that information into a new record. See Copy and Paste functions below.
 - Display all the first level action records associated with the
contact. Click
here for information on actions/activities. Second level activities could exist
as activities linked to Projects or Help Desk records that are, in turn, linked to this
contact.
- Display all the first level action records associated with the
contact. Click
here for information on actions/activities. Second level activities could exist
as activities linked to Projects or Help Desk records that are, in turn, linked to this
contact.
![]() - Include all activity records for all
connections linked to this contact. This could, of course, be a lot
of records.
- Include all activity records for all
connections linked to this contact. This could, of course, be a lot
of records.
![]() - This button is enabled where the
contact type is an Individual, but there is information entered in
the Company box and that Company does not have an ID. For example:
- This button is enabled where the
contact type is an Individual, but there is information entered in
the Company box and that Company does not have an ID. For example:
In such situation clicking the [Create company] button will create a new contact record as a Business type, with all the information taken from the Individual contact record. It will also create a connection record, linking the Individual record to the Business record.
After creating the new record, an information dialog will display some details about the new contact record.
After clicking [OK] from the information dialog, the Individual record will redisplay and will have the ID of the company record inserted:
[Print] - Prepares a printable document with all the contact information on it.
[Dups] - Checks for duplicates of this contact record.
[Hot] - Adds this contact to the Hot list on your Home page, for quick access.
![]() -
click the
[Quick note] button to pop up the quick note action window. Click
here for more information.
-
click the
[Quick note] button to pop up the quick note action window. Click
here for more information.
Links:
Click [Get Activities] to view all the action records linked to this contact.
Click [Connections] to display the connection list showing related contacts. Click here for more information.
![]()
[Projects] - Click it to display the Projects/Opportunities/Files module.
This module is used to attach projects, files and opportunities to the contact. The module can also contain second level activities, actions and documents specific to individual projects.
[Help Desk] - Display any help desk entries specific to this contact.
[Documents] - Display any first level documents (documents attached directly to this contact). Select the option "Include Project docs" to include all second level documents for any Projects attached to this contact.
[Orders] - Display any order entries specific to this contact.
![]() -
Visualize the contact and the first 2 layers of connections. Click
here for more information.
-
Visualize the contact and the first 2 layers of connections. Click
here for more information.
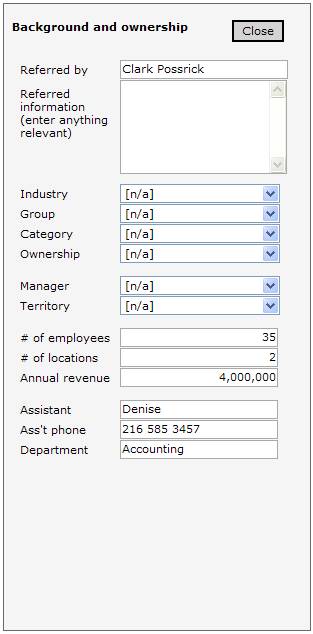
![]() - Open the Background and ownership
panel for this contact. Enter any relevant information. Populate the
dropdown lists through the Administration module.
- Open the Background and ownership
panel for this contact. Enter any relevant information. Populate the
dropdown lists through the Administration module.
![]() [Address/phones]
Create and attach an unlimited
number of addresses and/or phone records to a contact.
[Address/phones]
Create and attach an unlimited
number of addresses and/or phone records to a contact.
Custom Panels:
Up to 10 custom panels are supported, with each panel holding an unlimited number of fields. For example, a custom panel named "Preferences" has been added:
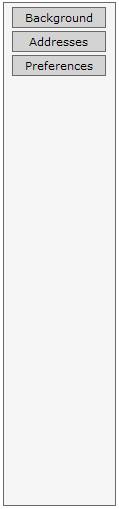
When the [Preferences] button is clicked, it displays the panel for data entry:

Copy and Paste functions:
Click [Memorize] to memorize the contents of the current contact record. Start a new record and click [Insert memory] to insert the memorized information into the applicable fields of the new record.
Or:
Copy information from any source, then click [Paste] to display the Quick contact form. For example, in the following, a name and information has been copied from a source, then pasted into the form:
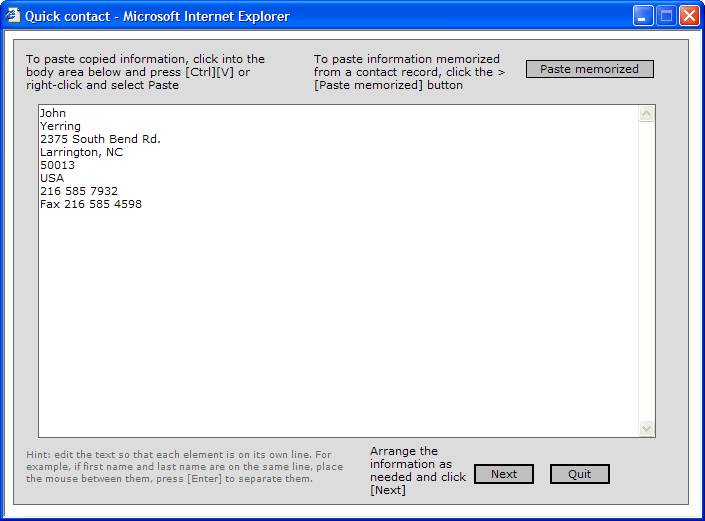
Click [Next] to move to the field matching section of the Quick contact form. Click an option button (below, the Zip code option button has been selected (value: 50013). Click the button next to the field it relates to (below, the [Zip] button has been clicked). Continue to match source to target field.

You can also edit any entries or enter information directly into any target field. For example, the Comments field has been completed:

Click [Finish] to close the Quick contact form and cause the information to be posted into the applicable fields on the contact record.