![]()
Catalog Manager

Click the Catalog Manager icon from the menu to display the Catalog Manager list.
Typically, the icon is located on
the Products menu. Access through the Products button  on the Home page menu.
The Catalog manager is very similar to the Document Manager in that it stores specific files, documents and images in a folder on your server, with these exceptions:
1. Catalog manager is intended for documents, images and files that represent your product line or the documents, images and files you wish to share with customers, vendors, consultants and others who are not registered as users.
2. Catalog manager provides a link to the related product in the Products/Inventory module.
3. Catalog manager stores its files in a folder named catalog, with optional additional storage in a folder named catalog_public. The optional storage into catalog_public occurs if you select the option Publish to web site.
Allowing outsiders to access the public folder, catalog_public:
The catalog_public folder is a browseable folder so that you can design web pages that access that folder and display the catalog items to the general public.
In addition, a Microsoft Access database named q_public_catalog.mdb residing in that folder is updated.
Your web design can use ASP.NET, ASP, PHP or any suitable server-side language to access that database.
This enables potential customers or other interested parties to browse through the contents of catalog_public, displaying or accessing the files therein. The database q_public_catalog.mdb provides the following information:
- File name
- Document group
- Document sub-group
- Reference
- Description
- Keywords
- Type (.JPG, .TXT, .BMP, etc.)
- Product name
- Unit price
- On hand
- Supplier ID
- Quantity per unit
- Discontinued
Late additions (click here or scroll to bottom for details) The following functions/features were recently added/ updated:
|
You can add keywords and other references that enable quick search and retrieval.
The Catalog Manager has two key forms:
- Catalog Manager list for searching various ways and listing catalog items.
- Catalog Manager details for adding new, modifying/deleting existing catalog items and related keywords, references.
List actions area:
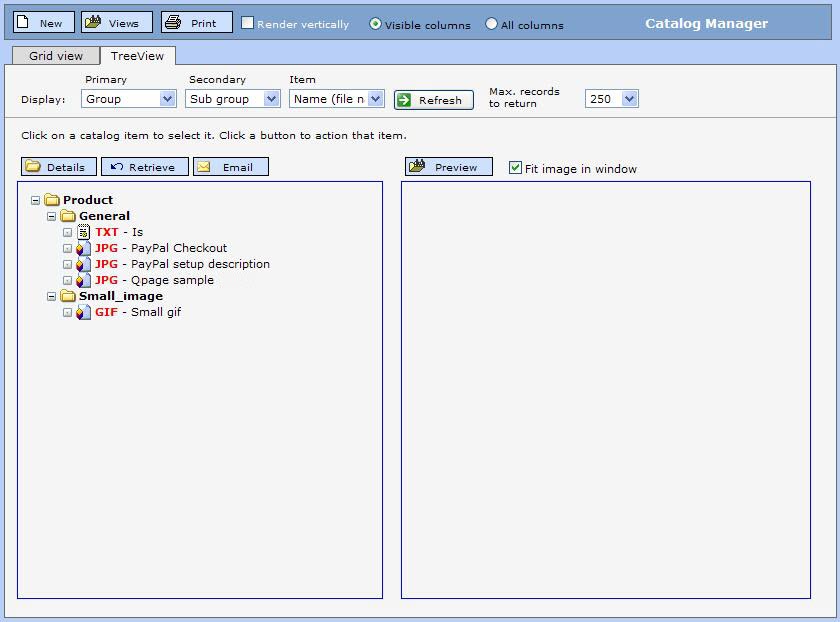
The Catalog Manager list area defaults to the Tree View. See Late additions (click here or scroll to bottom for details) for information on the Tree View.
Catalog Manager - List - Tree View
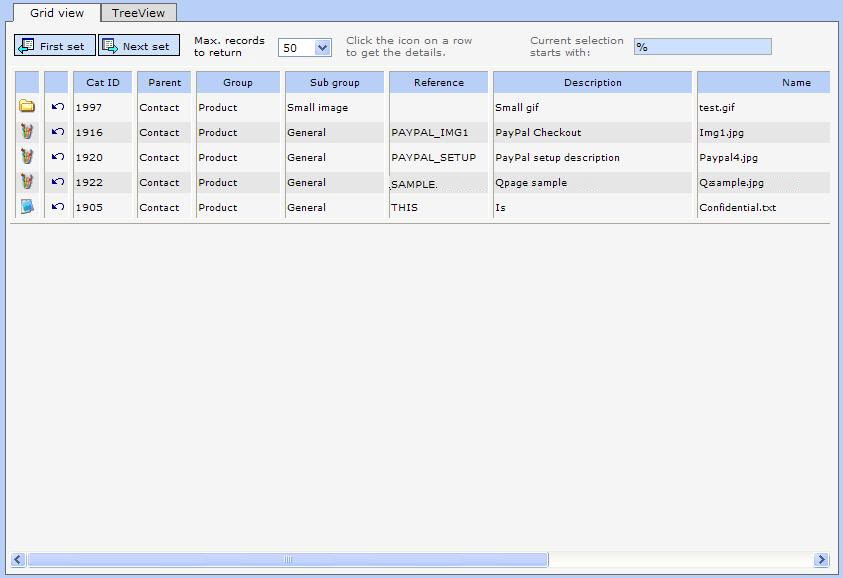
Catalog Manager - List - Grid View
List actions area:
The Catalog Manager list area defaults to the Tree View. See Late additions (click here or scroll to bottom for details) for information on the Tree View.
Grid View:
Use the [Search] button to locate a specific catalog item. Click here for information on searching. Click [First] to get the first set of records that match the search criteria. Click [Next] to get the next set.
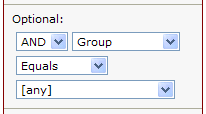
Note the special optional search to filter catalog items by group:
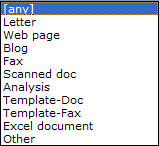
The drop down provides several selections:
Note that the selections are customizable. See the Administration module for more information.
Click [Print] to create a printable list of the currently-displayed record list. Select options to print only the columns in the displayed grid, or to display all columns in the record. Click Render vertically to change the format of the printable list.
Use the scrollbars to scroll the
list up and down, left or right. Click the folder icon ![]() on any row to display the complete detail record. Click [New] to open the detail display to add new
records.
on any row to display the complete detail record. Click [New] to open the detail display to add new
records.
Click on the title of any column to sort the list by that column. The display will change to show the records in either ascending or descending order. Click again to reverse the sort.
Customize the way the list displays, including column positioning, name and width and whether the column is to be displayed or hidden through the Administration module. Click here for more information.
If the list
is a pop-up from a search request, the background will be blue and
an additional icon (![]() ) will
display. Locate the row of the desired catalog manager record and click that icon
to return the catalog manager information to the calling module.
) will
display. Locate the row of the desired catalog manager record and click that icon
to return the catalog manager information to the calling module.
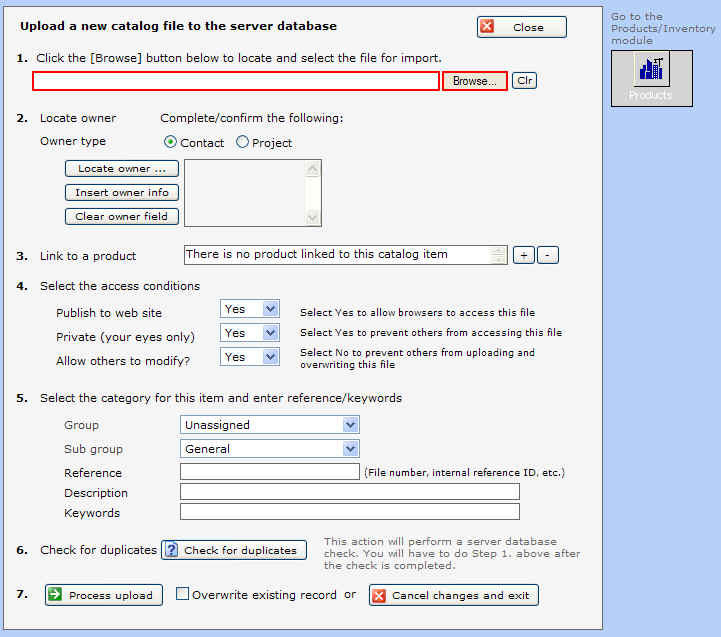
If you clicked [New] from the catalog list, the following screen will display:
This screen enables you to locate any catalog item on your computer and upload it to the centralized database. Follow the sequence of instructions.
1. Click [Browse] to locate the chosen file. The file path and name will be placed in the red-bordered box.
2. [Optional] Decide which owner type applies to this catalog item. Contact or Project. Click [Locate owner ...] or if you have previously located an owner you want to use click [Insert owner info] and insert owner data. Click [Go] to view the owner record.
3. [Optional] Select a group type, and add some lookup reference information and keywords, so that you can quickly locate this catalog item by using the Search options of the Catalog Manager list.
4. Select to overwrite an existing record, and click [Process upload] to upload the catalog item to the central database. Alternatively, click [Cancel changes and exit] or [Exit import] to exit the process.
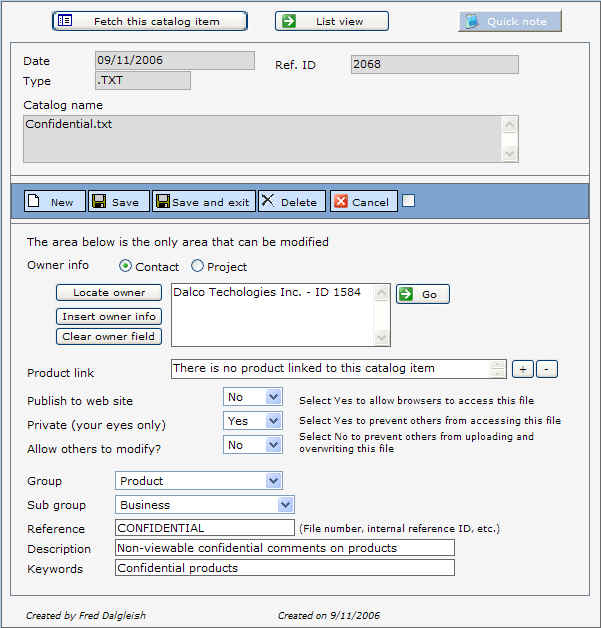
If you clicked on a row in the catalog list that contains an existing catalog item, the following screen will display:
Click [New] to start a new catalog item record. That action will cause the previous screen to display. Click here to view it.
If you have modified the record, it record must be saved or cancelled before any other functions are available (go to catalog list, fetch the catalog item, etc.). Click [Save] to save changes to the catalog item.
A dialog will display if there are any errors requiring correction, or if there were no changes detected.
Click [Cancel] to cancel current
changes. Alternatively, click in the checkbox ![]() beside the [Cancel] button to automatically cause cancellation when
the next action is taken. This is a quick way to move to another
function without having to press the [Cancel] button.
beside the [Cancel] button to automatically cause cancellation when
the next action is taken. This is a quick way to move to another
function without having to press the [Cancel] button.
Click [List view] to return to the catalog manager list.
Entering information:
Click any of the owner buttons to take the specific action. Click [Go] to jump to the owner record. Add Group, Reference and Keywords information as required.
Select a group and sub group if you wish, as these will help in searches. Enter a reference, description and keywords to further ease search.
Publish to web site:
Selecting Yes will result in the catalog item being saved in two folders: catalog and catalog_public. The latter is a browseable folder that empowers outsiders to view the contents of the folder. You can design web pages to access this folder.
In addition, a Microsoft Access database named q_public_catalog.mdb residing in that folder is updated. Your design can use ASP.NET, ASP, PHP or any suitable server-side language to access that database.
Also, click here to go back to the area above discussing this.
Private (your eyes only):
Selecting Yes will ensure that no one other than you can retrieve this catalog item. This is rarely used in catalog entries, but frequently used in the Document Manager.
Allow others to modify:
Selecting No will ensure that no one else can upload a catalog item with the same file name. This prevents accidental overwriting of your file.
From the catalog list, click
the loopback icon on the applicable row or from the document detail
form, click ![]() to have the
catalog item delivered from the server to your desktop, or
the web page opened in your browser.
to have the
catalog item delivered from the server to your desktop, or
the web page opened in your browser.
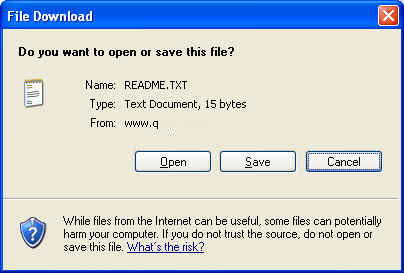
For the former, typically, you will see a dialog like this:
Take the appropriate action.
Quick note - click the [Quick note] button to pop up the quick note action window. Click here for more information.
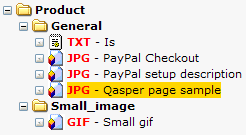
Tree View:
By default, the catalog manager list view opens with the Tree View.
The tree view does not support paging (first, next) as does the grid view. Instead, the tree view defaults to a list with 250 maximum records. This can be changed as needed, up to 1,000 records. It is recommended you use the
The tree view has Display options:
![]()
Select from each of the dropdown
lists to change the default display. Change 'Max. records ...' as
needed. Click ![]() to display
the Quick search panel to refine your searches.
to display
the Quick search panel to refine your searches.
Click on a line item to select it:
Click [Details] to display the item in the document detail page. Click [Retrieve] to retrieve the document onto your desktop computer. Click [EMail] to open an email with the document attached, along with pre-filled fields.
If the document is a text file (![]() )
or image (
)
or image (![]() ) click
) click ![]() to display the line item in the preview window. Select Fit image in
window to contain the image inside the preview window. Deselect Fit
image in window to display the full image in the preview window.
Scroll bars will display so that the image can be scrolled, if
necessary.
to display the line item in the preview window. Select Fit image in
window to contain the image inside the preview window. Deselect Fit
image in window to display the full image in the preview window.
Scroll bars will display so that the image can be scrolled, if
necessary.
