
Products
- Inventory 
Access the Inventory icon from the
Products icon  on the main
menu.
on the main
menu.
Use the Products - Inventory module to record and modify product items, update on hand, on order, set the unit price and discontinued status. Product fields are fully customizable through the administration module. Add as many fields as needed to round out the module to suit your needs.
Importing product/inventory records:
You can also use the Import Manager to import your existing inventory. Click here for more information.
The Inventory module has two key forms:
- Inventory list for searching various ways and listing tickets.
- Inventory details to for adding new, modifying/deleting existing records and related information.
Inventory list
List action area:
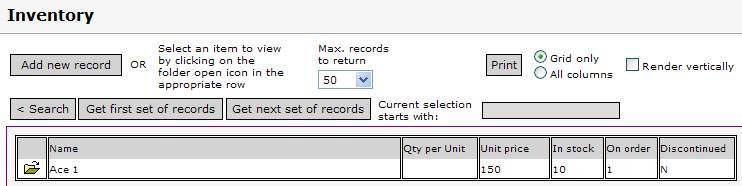
Use the [< Search] button to display the search panel and locate a specific help desk record. Click here for information on searching. Click [Get first set of records] to get the first set of records that match the search criteria. Click [Get next set of records] to get the next set.
Click [Print] to create a printable list of the currently-displayed record list. Select options to print only the columns in the displayed grid, or to display all columns in the record. Click Render vertically to change the format of the printable list.
Use the scrollbars to scroll the
list up and down, left or right. Click the folder icon ![]() on any row to display the complete detail record.
on any row to display the complete detail record.
Click on the title of any column to sort the list by that column. The display will change to show the records in either ascending or descending order. Click again to reverse the sort.
Customize the way the list displays, including column positioning, name and width and whether the column is to be displayed or hidden through the Administration module. Click here for more information.
Click [Add new record] to open the detail display to add new records.
If the list
is a pop-up from a search request, the background will be blue and
an additional icon (![]() ) will
display. Locate the row of the desired inventory record and click that icon
to return the inventory information to the calling module (for
example, the Order Entry or Help Desk module).
) will
display. Locate the row of the desired inventory record and click that icon
to return the inventory information to the calling module (for
example, the Order Entry or Help Desk module).
Inventory details
Details action area:
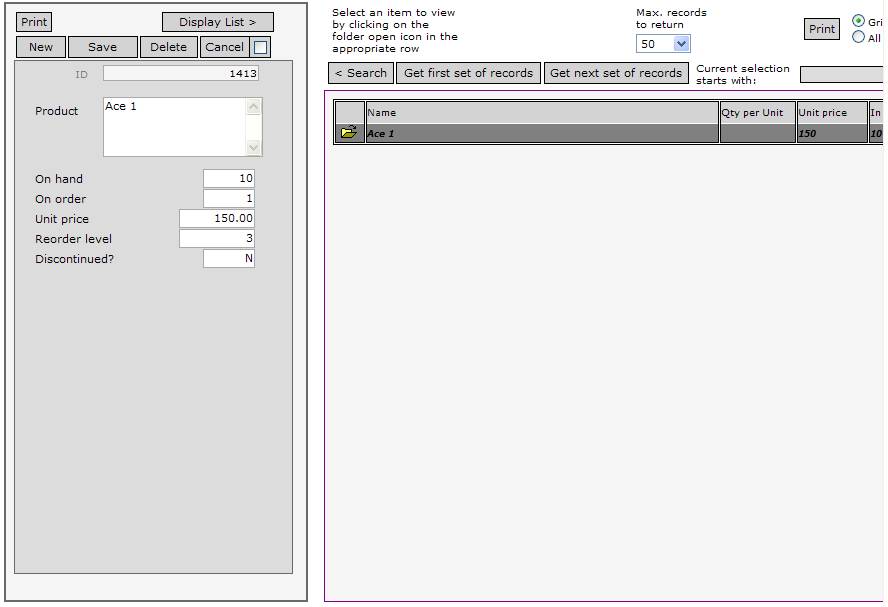
Click [New] to start a new product record. The record must be saved or cancelled before any other functions are available. Click [Save] to save the product record.
A dialog will display if there are any errors requiring correction, or if there were no changes detected.
An ID number will be displayed following the [Save] action.
Click [Cancel] to cancel current
changes. Alternatively, click in the checkbox ![]() beside the [Cancel] button to automatically cause cancellation when
the next action is taken. This is a quick way to move to another
function without having to press the [Cancel] button.
beside the [Cancel] button to automatically cause cancellation when
the next action is taken. This is a quick way to move to another
function without having to press the [Cancel] button.
Click [Display List >] to return to the inventory grid list.
Entering information:
An ID number will be automatically assigned when the record is saved.
Continue through the fields, entering information as needed.
Custom fields:
If custom fields have been defined, they will be to the right of the dotted vertical line. Press the [tab] key after the last email entry, or use the horizontal scrollbar to move to the custom field area.