![]()
To completely uninstall QSync, it is usually necessary to completely uninstall 2 components:
- Redemption (the DLL application that works between the installed database and Outlook)
- QSync itself.
- Delete folder and contents
To re-install Q Sync, click here for quick install info, or here for full information.
1.. Uninstall Redemption:
a. Close QSync (right-click in the bottom right icon tray of your screen, select [Restore] and click [Close]).
b. Using File Explorer, navigate to:
C:\Users\Public\Program Files\Dalco\QApps\QSync\Redemption
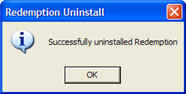
c. Double-click Install_uninstall.exe (or it may be named just Install.exe). When it loads, click the Uninstall link:
d. You should receive a confirmation:

2. Uninstall Q Sync.
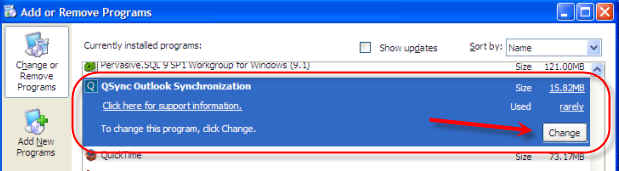
a. Select Start > Control panel > Add/remove or Uninstall programs
b. Navigate to QSync Outlook Synchronization (or a variation thereof).
c. Click and uninstall:
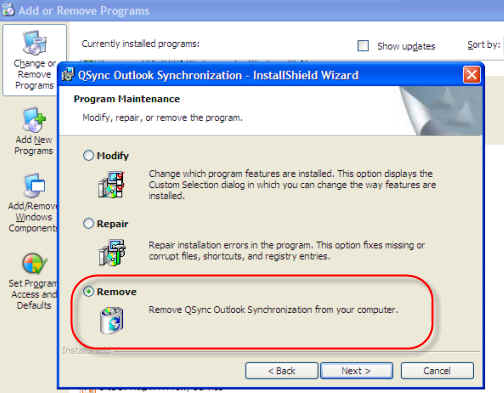
d. Remove and follow the instructions: images/qunins5.jpg
3. Delete the existing Sync folder and contents:
a. Using File Explorer, go to:
C:\Users\Public\Program Files\Dalco\QApps\QSync
b. Examine the contents of that folder. There should only be one file (gmail_registrations. xml) and one subfolder (Redemption). If there is anything else there, the uninstall did not work properly.
c. Delete the folder and its contents. BE CAREFUL - make sure you are deleting that folder and not any others.
1. Log on to your Home page.
2. Click [Show buttons]
3. Click [Desktop apps]
4. When the Desktop Applications page displays, click [Download Outlook Sync]
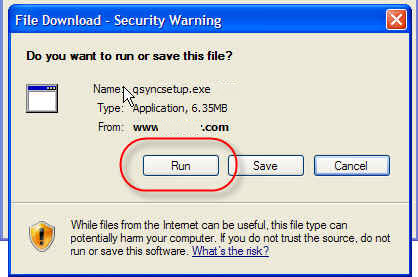
5. [Run] the installation and follow the instructions:
6. You will need to restart your computer for sync to begin. Each time you start your computer, sync will then automatically starts.
7. For more detailed information, go to here: http://dalcotech.com/qhelp/qdesktopsync.htm